Welcome!

The adventures of the vessel "The Hard Six" and the man owned by her!
Showing posts with label cabin refit. Show all posts

Saturday, March 12, 2016

Cabin Trim

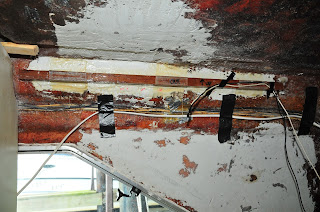
When Chris Craft built the boat they created trim panels that ran the leangth of the cabin liner to cover where the top cap and hull were mated and attached. Being the 80's they used a pretty horrible laminate material over some sort of fiberboard. It had not aged well over the years:


Since I truly enjoy varnish work, I decided to change these out to real teak. So I called my good friends at World Panel Products and a couple days later a giant box was on my front doorstep.


It was pretty easy to overlay the old panels to cut the new ones. Making like for like.


Never underestimate the worth of a cheap power too from Harbor Freight!


After 1 coat of varnish


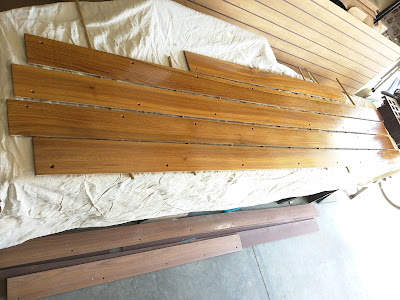
Here are the results, 7 (I think) coats of Flagship Varnish later:


 I'll try to remember to add photos of the cabin with these installed. For some reason, I never took any! Go figure. But I can tell you, it made way more of a difference than I ever expected it would!

Friday, August 21, 2015

New MSD

So I ordered a new MSD (head) for the boat... It came via FedEx... I have this odd urge to open the box and sit on it - just to see.

Wednesday, December 12, 2012

Jim's Teak refinishing, Inc.


When I was a kid, we had a 1958, 42' Matthews double cabin. If you ask my mother, she'd say this was when I became infected with the boating virus. By the way, there is no known cure for this particular type of insanity. Ever.

She was mahogany over oak stringers. I generally say she was like furniture with engines. As you can imagine, my Father was a whiz with wood and taught me a few things here and there. So when it came time to do varnishing, I said "no problem, I got this". 

I wanted to replace as much of the teak vinyl veneer that was in the boat as was practically possible. It was ugly and lets face it, it wasn't fooling anyone, not even itself. There is nothing that looks like Teak with a bunch of varnish on it. It almost glows and I love the look of it. 


I did a bunch of research and the best choice for me seemed like Pettit's Flagship Varnish. And it's very, very good. At $120 a gallon, it better be!


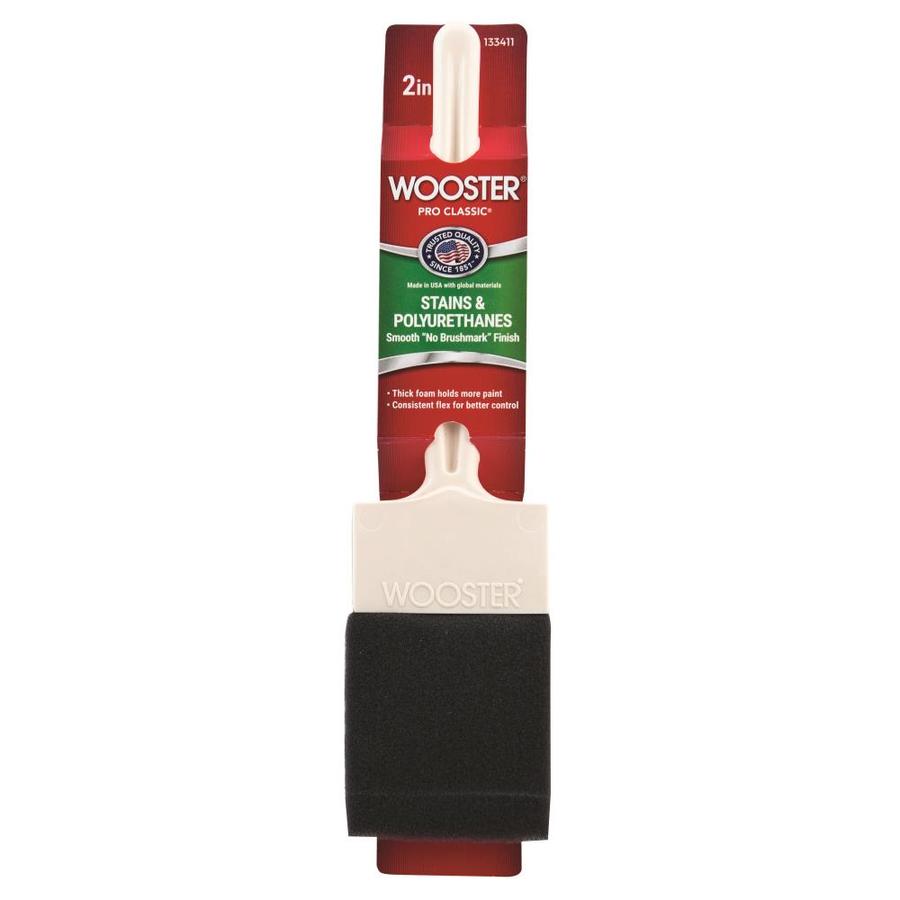
Here's a tip..... There is a huge argument as to if you should use natural brushes or foam "throwaway" ones. Maybe the really good guys can get a better result with the natural bristle ones, but I found I could get a more even coat, with less brush marks, with foam ones. Now, you might think all foam brushes are crated equal. They aren't. Do yourself a favor and get the good ones! Yes, I know, they are 3x as expensive... and there is a reason! The ones I use are made by Wooster and have plastic, molded handles. You can use them about 3 or 4 times if you clean them before you have to throw them away and they don't fall apart like the cheap ones do. 


I started with recovering all the doors and drawers with real Teak veneer from World Panel Products in South Florida.  It comes in 4x8 sheets. You can see a partial one in the background of this photo.


This is after only 1 coat of varnish.


And this is after 6 coats of varnish. See what I mean about the "glow"?


Trim rails and kick plates from the cabin post sanding. The one in the foreground is for comparison.


And after....


Here's another tip - your double sided ladder makes for a good drying rack!


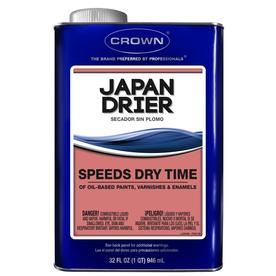
Crown Crown Quart Japan DrierAs an aside... I called Pettit's tech support. They recommend that you not varnish in humidity above 80 %. I explained to the rep that I was in Florida. He sort of laughed. 

I had read about a product that you can add called Japan Drier (available at Lowes). It helps offset high humidity and makes the varnish dry a bit faster. Otherwise it is a week between coats here. This stuff is like magic. 

If you live in Florida, or anywhere humid. It's a Godsend. The guys from Pettit just recommended that you not use more than 10% ratio and never, ever add it to the main can, only your work pail. Otherwise you will ruin a perfectly good gallon of varnish as it will become a solid after about 3 days. 

Sunday, November 11, 2012

The Tile Project

I'd like to say that this project was my idea. I'd like to say I looked at the galley and said "you know what this needs is".

I can't.

I belong to a "club" online called the Chris Craft Catalina Club. Another member there had this idea way before me. I'd like to think I did it better - Hey! It's my boat, let me have my dillusion!


When I got the boat the back of the galley looked like this:

This is the breadbox as it became to be known.

Ugly, and basically useless. It existed to hold radios and a light. Had very little storage, and made the cabin seem smaller.


The backsplash was this "faux stainless" veneer over marine plywood. It was dull, stained, and pretty ugly overall. And yes, I trashed the paper towel holder.


When I got the breadbox off the bulkhead, I discovered that the back corner had wet rotted over the years and was soft and weak. Oh great, now I have to build a new bulkhead. That means I have to go buy more marine ply. Joy.

Oh sure, it looks easy here. I can guarantee it was not. I had to cut that outboard curvature twice to get it right and then grind on it with a sander till it fit. It took hours.


My friend Fred, being the constant-researcher and Mike Holmes in training, found this stuff. It's called Ditra. Its used to isolate tile from a substrate to reduce vibration and flex. I was concerned about putting tile on a boat, since boats are always flexing. The Ditra is designed to act as a shock absorber and keep the tile from coming off. (update - 6 months later, and it's still perfect). We also used the most flexible grout we could find for the same reason. As you can also see the headliner is now installed and I am keeping the Blue Tape Division at 3M in business, all by myself.


Fast forward a couple days and here's a shot of the tile, installed. It's a glass block style tile available at Home Depot.


Here's a close up after it was grouted and cleaned up. I'm thrilled with the way it came out! You can also see the new sink and faucet in this photo and a nice closeup of the Corian counter tops.


And one more of the whole corner, after it was all done.


I had never done tile before. Fortunately for me, Fred had, and lives to supervise. It wasn't as bad as I thought, but very messy. In the end, I really feel like it was worth it and really makes the boat seem much more modern.

Saturday, October 20, 2012

The New Headliner

One of the very first things I wanted to do when I saw the boat was to replace the headliner. The material that was installed when the boat was new was this sort of carpet that resembled monkey fur. Over the years it had yellowed, it had stains from the previous owner (who was a smoker), water marks from leaks, and even had pulled away in some places.

Somehow I managed to have no photos of the before. Not sure how that happened!


The first vendor I hired did an incredibly bad job. So bad, in fact, that I fired him from the job and tore all his work out after he left my vessel. I won't give any names, but I think this photo speaks for itself:


The new vendor was appalled by the work done by the previous one. Told me all the reasons that it failed, and suggested the best way possible to redo it. 


You'll notice that the bulkheads that divide the head from the cabin are missing as well. The headliner guy suggested that the job would look much better if I pulled them. They needed recovered anyway, so I did. You can see that in another blog entry


 The material used is a suede - almost feels like a microfiber.


Now there are jobs I'll do, and jobs I know I won't be able to do well. This one falls in the latter category. 

I'm thrilled with how it came out and really feel like it updates the look of the cabin from 1986 to 2012. 

Sunday, September 16, 2012

Furring Strips

 One of the upgrades I wanted to make on the boat was to remove the old 12v lighting and replace it with new 12v LED lighting. While I was at it, I figured I could make it more of a focal point of the new cabin. In order to do that, I had to install some furring strips to attach the new light fixtures on to . Here's a few photos:

Head fixture

Main Cabin

In the forepeak


All the strips were initially held in place using West System G5 Epoxy. Then once dry, I tabbed them in using fiberglass strips and used West System epoxy to make sure they were permanent.

There were three main fixtures: One in the head, one in the main cabin, and one to cover the backing plate for the anchor and pulpit hardware.

Just a word to the wise... Working with epoxy above your head is messy. Don't just wear gloves and a mask. You'll want goggles too. Trust me.


Tuesday, September 4, 2012

New Fridge


So my fridge stopped working on shore power. I really hated the idea of running 24x7 on 12v almost as much as I hated the idea of warm beverages on my boat.

In reading about Norcold refrigerators, it mentioned that there was a fuse in the back of the fridge that may have tripped (on the newer ones, there is); so we pulled it out.

To say that the bottom of the fridge was rusty would imply that it still had a bottom. Which it pretty much didn't. It was so rusted and "flaky" that it crumbled in my hand.

I had to go to West Marine for something else anyway, and wouldn't you know it they just happened to have the right one (Norcold 3.6 ft2 AC/DC) in stock that was a perfect fit. Even better, it was dented on the front panel, and on the side. So I got a deal on it.

Cut and slid in the a front Teak veneer panel, and:

In the garage, veneered and ready to go 
Here it is after installation

I think it looks great and when the teak is varnished or oiled (haven't decided yet) it is gonna look amazing.

Jim

Friday, August 17, 2012

The leak, pulpit, and tropical storm - Part 1

No, it's not a movie with Steve Martin and John Candy.

I had looked everywhere I could think of in the cabin for the source of the leak that was manifesting itself in the Head. I had poked, inspected, and tested everywhere I could imagine that water could be getting in. All of that testing left me with one conclusion. The water had to be getting in at the bow pulpit. Of course I was hoping that I could just rebed or reseal something.

That was not to be the case.


In looking at the anchor chain passthrough from the underside, I could see that there was a gap between the deck and the pulpit. I knew that had to be where the water was ingressing. You can see the gap here if you look hard.


I knew that meant the pulpit had to come off and I knew that meant the boat needed to come out of the water, anchor removed and bow rails removed. NOT a small job. As the boat came out of the water I found out that there was a tropical storm headed my way. Leaky cabin + tropical storm = big problem. Fortunately, the manager at my marina was nice enough to let me move the boat into the dry storage facility. It was off season, and since it was raining anyway, it wasn't a big deal for them.


And so the work began. My buddy Fred had "volunteered" to come up and help out. A decision he would soon regret


The first thing I discovered was that the windlass had not been properly bedded, which explained the leak. But the rot had to be repaired and I couldn't figure a way to fix the leak without pulling the pulpit, so we continued removing it.


When the pulpit was off, we were greeted with this sight. That's teak you are looking at. Rotted, soaking wet, teak. The good news is that it came off really easily. The bad news was I knew we were going to have to engineer a replacement.


By now it was midnight (ish) and both of us were exhausted from working in the Florida heat. We called it a night. 

Sunday, March 18, 2012

The TV Project

One of the things that I though The Hard Six needed was additional creature comforts.

Last year I added a stereo and some Infinity speakers for "on deck" entertainment. That was good, but mostly when underway, or in the cockpit. So, being a normal American, I decided that the old girl needed a TV.

So, I cashed in my credit card miles for Amazon.com points and order a 26" Vizio LED TV, mounting bracket, and Western Digital WDLive Internet content streaming device, plus an antenna.

That was the easy part!


My buddy Fred used to be in the custom home theater business, so he agreed to help me hang it since he is a wiz with that kind of stuff.

I also scored a really nice matching Vizio SoundBar at CompUSA that was the perfect fit for the ledge in the cabin just below the TV. You can see it in the photo here.


I wanted the wiring hidden as much as possible so, we drilled a couple holes in the cabin shelf, and installed an outlet in the hanging locker. Once that was done, we routed all the cabling and secured it to the bottom of the shelf using screw down zip ties.


A Peerless swing tilt bracket was mounted to the bulkhead so you would be able to see the TV from the bunks or the dinette.


And finally, everything all wired up, wire loom to cover the wiring running to the TV and ready to go!

You can see the little WDLive box next to the SoundBar. This think can stream music and video over the Internet, or you can plug in a USB stick and play locally. Not a bad gadget for $50!


All and all, it really makes the cabin much more like a home away from home and I know I will get a lot of use out of the TV and the SoundSystem!


Sunday, October 9, 2011

Oh this shouldn't be that hard...

When I got the boat, her starboard side cabin window was leaking... badly. It's an old boat. I expected some of these types of issues. It come with the territory.

This was to be the first project on the boat. It certainly was the one that was needed the most.

So I did a bunch of research, read blogs, read forums, everything I could find on the right way to do this project. 

It seemed simple enough, remove the screws, pry out the old caulk and the window should pop right out. Clean, prep, re-caulk, insert window, replace screws. Right?

So I was off....


 Picking and peeling away the caulk that was original to 1986 even after 25 years, the bead on the bottom was still very tight. 


After a while (notice it's now dark outside) of prying, prodding, peeling, and pushing, the window finally came lose.


Not without leaving a fair amount of the old sealant on the frame. I knew all of this needed to be removed, cleaned and prepped for the new sealant

Before sealant removal

After sealant removal.


The fiberglass frame, ready for the window. I removed as much of the old sealant as I could with razor blades, scrapers and even a wire brush wheel on my drill. Note: Be careful if you do this, it can really rip your fiberglass up, but if you are VERY careful, it will pull the old stuff off fast.


Here's the window out, and ready to be cleaned and caulked.

Now, the photos stop here... Why? Because it was now 2:15am, and I just wanted to get this thing DONE. It's pretty straightforward from here, just prime it with sealant, reinsert and you should be good (see the notes at below)

So here's what I learned for anyone that may attempt this project:

- The sealant that Chris-Craft used was some incredibly strong stuff. Since it's in a cabinside, it needs to be flexible, otherwise the glass could break. After reading everything I could find, it appeared that 3M 4000 UV was the best sealant to use for this job. 3M considers it to be non-permanent. As an aside, I wasn't happy with how the window seated and tried to remove it. Forget it. 3M has an insane idea of what "non-permanent" is I don't think that window would have come out with TnT. 

- The cleanup of the excess caulk is a bear. if I was doing this project again, before I pulled the window, I would tape the entire perimeter of the window with painter's tape to make cleanup easier. That way the caulk would come right off. Otherwise you are going to be scraping for hours.

- More is not always better.... It's hard to judge the amount of 4000 that you will need, I used a lot and when I put the window in, it was everywhere. It sticks to everything 3M does not make a solvent for it. 

- The original screws on our boat were #8. I replaced them with #10's since the holes are directly into the fiberglass and didn't have much bite when I put #8's in.

Jim